Cheesecake is more than just a dessert; it’s an experience. A well-made cheesecake, with its creamy, rich filling and buttery, crisp crust, has the ability to transport you to a place of pure indulgence. If you’re someone who cherishes classic desserts with a twist, you’re in for a treat with this Classic Cherry Cheesecake with a Gluten-Free Option.
This recipe brings together the best of both worlds: a decadent, smooth cheesecake topped with sweet, tangy cherry pie filling, with the option to make the crust gluten-free. Whether you’re celebrating a special occasion or simply treating yourself, this cheesecake will quickly become your go-to recipe. Indulge in gourmet dining at home with our Baked Spinach Mushroom Quesadillas
But what truly makes this cheesecake stand out is its versatility. With just a few simple ingredients, you can create something that not only tastes incredible but also caters to different dietary needs—gluten-free, anyone? Ready to dive into a dessert that will wow your taste buds and impress your friends and family? Let’s get started!
Why You’ll Love This Classic Cherry Cheesecake
1. A Timeless Dessert with a Cherry Twist
There’s something undeniably comforting about cheesecake. It’s the kind of dessert that’s perfect for a family gathering, a birthday party, or just a quiet evening at home. The creamy texture of the cheesecake pairs perfectly with the sweet and slightly tart cherry topping, making each bite an indulgent experience. But why stop there? With this recipe, you have the flexibility to cater to those who need a gluten-free option without compromising on flavor or texture.
2. Easy to Make, Yet So Impressive
While cheesecake might seem like an intimidating dessert to make, this recipe proves that it doesn’t have to be. The simple steps, combined with the right ingredients, ensure that you’ll end up with a cheesecake that’s not only delicious but also visually stunning. Plus, your guests will be amazed at how perfectly the cherry topping complements the rich, smooth filling.
3. Gluten-Free Option for Everyone to Enjoy
Whether you or your guests are gluten intolerant or simply prefer to avoid gluten, this recipe can easily be adapted to suit your needs. By using gluten-free graham crackers for the crust, you can make this cheesecake accessible to anyone. The best part? The taste doesn’t change a bit!
The Perfect Crust for Your Cheesecake: Getting It Just Right
Ingredients for the Classic Graham Cracker Crust
A great cheesecake starts with a solid base, and this recipe delivers just that with a graham cracker crust. The combination of graham cracker crumbs and melted butter creates the ideal base for your cheesecake: crisp, buttery, and perfectly structured.
If you’re making a gluten-free cheesecake, simply swap out traditional graham crackers for gluten-free graham crackers. You’ll still get that crunchy, sweet crust that perfectly complements the smoothness of the cheesecake filling.
Crust Ingredients:
- 1 cup graham cracker crumbs
- 4 tbsp unsalted butter, melted
How to Prepare the Crust
- Preheat the Oven: Set your oven to 350°F (175°C).
- Line the Pan: Line the bottom of your 7-inch springform pan with parchment paper. This ensures easy removal of the cheesecake after it’s baked.
- Mix the Crust Ingredients: In a medium-sized bowl, combine the graham cracker crumbs and melted butter. Stir until the mixture resembles wet sand.
- Press the Crust: Evenly press the crumb mixture into the bottom of the springform pan. Use the back of a spoon to ensure it’s firmly packed, and press some crumbs up the sides of the pan for added texture.
- Bake the Crust: Bake the crust for about 8-10 minutes. Keep an eye on it to ensure it doesn’t over-brown. Once done, set the crust aside to cool.
Tip: For an added layer of moisture control during baking, place a baking dish filled with water on the lower rack of your oven. This helps prevent the cheesecake from cracking due to temperature fluctuations.
The Creamy Cheesecake Filling: A Dreamy Centerpiece
Now, it’s time to prepare the cheesecake filling, which is where the magic happens. The rich combination of cream cheese, heavy cream, and sour cream gives the cheesecake its signature smooth and velvety texture. The vanilla extract adds warmth, while the sugar and salt help balance the flavors.
Ingredients for the Cheesecake Filling
- 2 (8 oz) packages cream cheese, softened
- 2 large eggs
- 2/3 cup sugar
- 1/3 cup heavy cream
- 1/3 cup sour cream
- 1 tsp vanilla extract
- 1/4 tsp salt
How to Prepare the Cheesecake Filling
- Lower the Oven Temperature: Reduce the oven temperature to 325°F (160°C).
- Mix the Ingredients: In a stand mixer or large bowl, beat the softened cream cheese, sugar, heavy cream, sour cream, vanilla extract, and salt until smooth and creamy. Scrape the sides of the bowl as needed to ensure everything is well combined.
- Add the Eggs: Add the eggs one at a time, mixing just until each egg is incorporated. Avoid overmixing, as this can cause air bubbles, which may result in cracks.
- Pour the Mixture: Once the cheesecake filling is smooth and well-mixed, pour it into the prepared crust. Smooth the top with a spatula.
Baking Your Cheesecake: Achieving the Perfect Texture
The baking process is crucial in achieving that perfect cheesecake consistency—smooth and creamy with a slight wobble in the center. Here’s how to bake it to perfection:
- Bake the Cheesecake: Place the cheesecake in the oven and bake at 325°F for approximately 75 minutes. Check it after 60 minutes. The cheesecake should be mostly set with a slight jiggle in the middle.
- Cooling: Turn off the oven once the cheesecake is done. Crack the oven door slightly and allow the cheesecake to cool inside for about 1 hour. This gradual cooling process helps prevent cracks.
- Chill: After 1 hour, remove the cheesecake from the oven. Let it cool at room temperature, then refrigerate it for at least 4 hours or, even better, overnight to allow the flavors to set.
Cherry Topping: A Sweet, Tangy Finish
The cherry topping is where your cheesecake truly comes to life. Not only does it add a pop of color, but the combination of sweet and tart cherries pairs perfectly with the rich creaminess of the cheesecake. You can use a store-bought cherry pie filling, ensuring it’s gluten-free if you want to stick with the gluten-free option.
Ingredients for Cherry Topping
- 10 oz cherry pie filling (make sure it’s gluten-free)
How to Add the Topping
- Chill the Cheesecake: Once the cheesecake is completely cooled and chilled, it’s time to add the cherry topping.
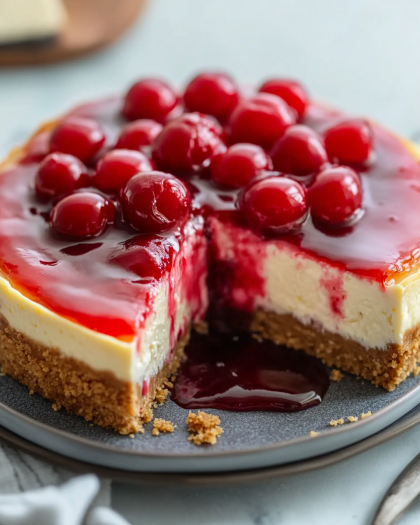
- Top with Cherries: Gently spoon the cherry pie filling over the top of the cheesecake. Ensure the cherries are evenly distributed, and don’t worry if some of the juices spill over the edges—that just adds to the visual appeal.
- Serve and Enjoy: Once the topping is in place, your cheesecake is ready to be sliced and served.
Storing and Serving Your Cherry Cheesecake
Storing Leftovers
If you happen to have any leftover cheesecake, it’s important to store it properly to maintain its freshness:
- Refrigerate: Keep your cheesecake in the refrigerator in an airtight container for up to 3-4 days.
- Freezing: Cheesecake can also be frozen! Wrap it tightly in plastic wrap and aluminum foil, and store it in the freezer for up to 2 months. When you’re ready to enjoy it again, let it thaw in the refrigerator for several hours.
Serving Suggestions
For an extra special touch, serve your cheesecake with a dollop of whipped cream or a few fresh cherries on top. It’s all about making the presentation as delicious as the dessert itself.
FAQs About Making Classic Cherry Cheesecake
1. Can I make the cheesecake crust gluten-free?
Yes! Simply use gluten-free graham crackers to make the crust, and you’ll have a gluten-free cheesecake that tastes just as delicious as the original.

2. Can I use a different fruit topping?
Absolutely! This cheesecake pairs well with a variety of fruit toppings like strawberries, blueberries, or even a mix of tropical fruits.
3. How do I know when my cheesecake is done?
The cheesecake should be mostly set with a slight jiggle in the center. It should not be fully solid, as this can lead to a dry texture. If you’re unsure, a toothpick or knife inserted in the center should come out clean or with just a small amount of filling attached.
4. How long should I cool my cheesecake before refrigerating it?
Let the cheesecake cool in the oven with the door slightly cracked for about 1 hour. After that, remove it from the oven and let it cool completely at room temperature before refrigerating it for at least 4 hours.
Conclusion: The Perfect Dessert for Any Occasion
There’s no denying that Classic Cherry Cheesecake with a Gluten-Free Option is a showstopper. It’s easy to make, incredibly delicious, and customizable to suit any dietary need. Whether you’re preparing it for a special occasion or a casual family dinner, this cheesecake will always leave your guests asking for more.
So, what are you waiting for? Grab your ingredients and get baking. This cheesecake is waiting to become a part of your next memorable celebration. Let your baking skills shine, and don’t forget to share the love with your friends and family. After all, a great cheesecake is meant to be shared!
Print
Classic Cherry Cheesecake with a Gluten-Free Option: The Ultimate Recipe for Every Occasion
- Total Time: 45 minutes
Description
- Make a rich classic cherry cheesecake with a gluten-free option. A sweet, delicious dessert for any occasion
Ingredients
- Crust:
- 1 cup graham cracker crumbs (use gluten-free graham crackers for a gluten-free option)
- 4 tbsp unsalted butter, melted
- Cheesecake:
- 2 (8 oz) packages cream cheese, softened
- 2 large eggs
- 2/3 cup sugar
- 1/3 cup heavy cream
- 1/3 cup sour cream
- 1 tsp vanilla extract
- 1/4 tsp salt
- Cherry Topping:
- 10 oz cherry pie filling (ensure it’s gluten-free for a gluten-free version)
Instructions
- Crust:
- Preheat your oven to 350°F. Line the bottom of a 7-inch springform pan with parchment paper. Combine the graham cracker crumbs and melted butter in a bowl, then press the mixture into the bottom and up the sides of the pan to form an even layer. Bake for 8-10 minutes, then set aside to cool. Place a baking dish filled with water on the lower rack of the oven to help maintain moisture.
- Cheesecake Filling:
- Lower the oven temperature to 325°F. In a stand mixer, beat the softened cream cheese, sugar, heavy cream, sour cream, vanilla extract, and salt until smooth. Scrape the sides of the bowl, then add the eggs one at a time, mixing just until each egg is incorporated. Pour the mixture into the prepared crust.
- Bake:
- Bake at 325°F for 75 minutes. Once done, turn off the oven, crack open the oven door slightly, and let the cheesecake cool inside for about 1 hour. Afterward, remove the cheesecake from the oven and let it cool completely at room temperature. Refrigerate for at least 4 hours or overnight.
- Cherry Topping:
- Once the cheesecake is fully chilled, gently spoon the cherry pie filling over the top. Remove the cheesecake from the springform pan, slice, and enjoy!
- Prep Time: 25 minutes
- Cook Time: 25 minutes
Nutrition
- Serving Size: 8 servings
- Calories: 350 kcal per serving
Keywords: #CherryCheesecake #DessertGoals #GlutenFreeDesserts #CheesecakeLovers #BakingAtHome #SweetTreats #EasyBaking