You know that moment when something simple—like a crisp, garlicky bite—stops you mid-chew because it’s just that good? That’s exactly what happens when you try these homemade pickled mushrooms. Whether you’re someone who always has a stash of pickled veggies in the fridge or just love experimenting with flavor-packed snacks, this recipe is about to become a go-to favorite. Indulge in gourmet dining at home with our Baked Spinach Mushroom Quesadillas
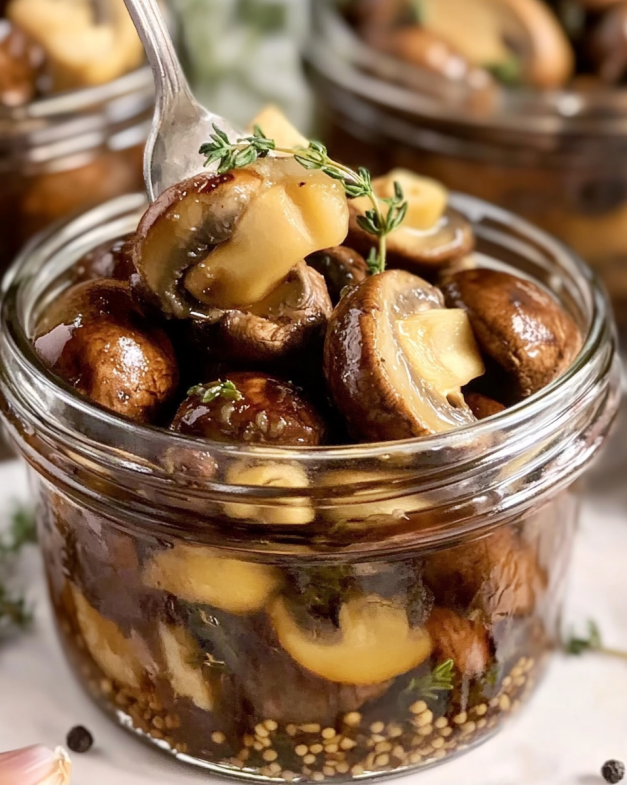
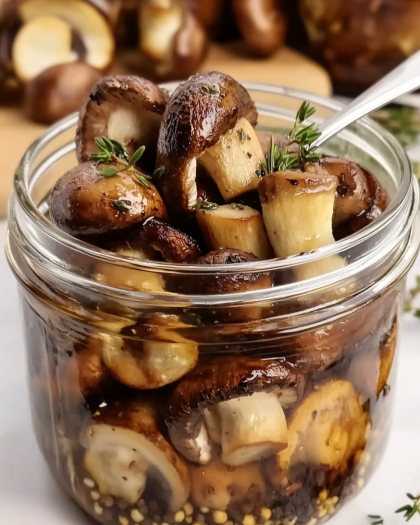
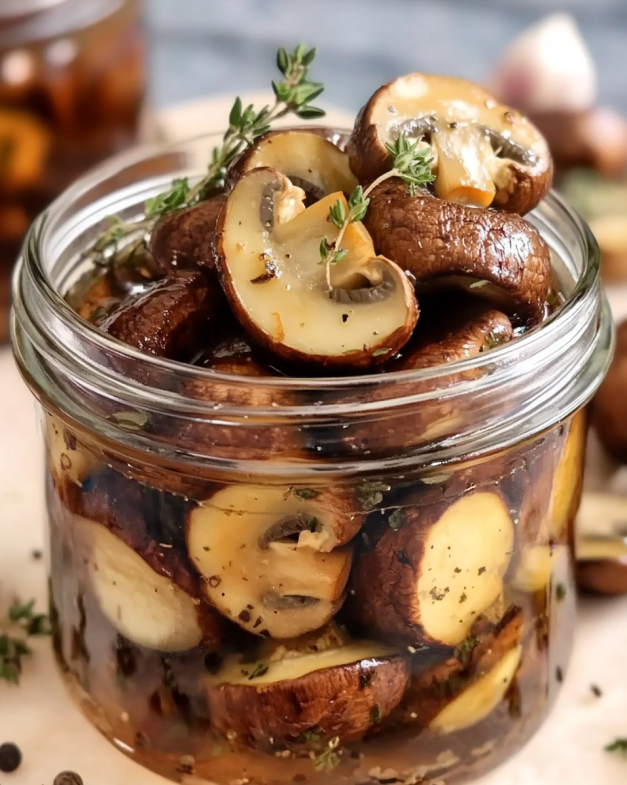
There’s something satisfying about turning fresh mushrooms into a jar of savory, tangy goodness. The mix of garlic, thyme, and black peppercorns draws out their earthy character while the roasting process gives them a depth that raw pickles can’t match. And the best part? You don’t need fancy equipment or hours of your time.

Why These Pickled Mushrooms Deserve a Spot in Your Fridge
Let’s be honest—pickled mushrooms don’t always get the spotlight they deserve. But once you try these, you’ll realize they’re the flavor bomb you’ve been missing.
Here’s why they stand out:
- Quick and easy prep: You’re looking at under 30 minutes from start to fridge.
- Bold, rich flavors: Roasting mushrooms before pickling brings out an umami warmth that elevates everything else.
- Naturally vegan & gluten-free: Great for nearly any dietary preference.
- Low in calories, high in taste: Just around 50 calories per serving.
- Customizable and versatile: Tweak the herbs, spices, or vinegar and enjoy them in everything from sandwiches to grain bowls.
You’re not just making a side dish. You’re creating a homemade treat that tastes like it came from a gourmet kitchen.
Your Ingredient Checklist: What You’ll Need
Before you dive in, let’s make sure your kitchen is ready. This recipe uses basic pantry ingredients with big payoff. Here’s a breakdown to help you prep smoothly.
🧂 Ingredient Table
| Ingredient | Amount |
|---|---|
| White button or cremini mushrooms | 1 ½ lbs |
| Vegetable or olive oil | 1 tbsp |
| Sea salt | 1 ½ tsp (divided) |
| Minced garlic | 2 tsp |
| Water | 2 cups |
| White vinegar | 1 cup |
| Granulated sugar | 2 tbsp |
| Garlic (thinly sliced) | 4 cloves |
| Black peppercorns | 2 tsp (divided) |
| Fresh thyme sprigs | Several |
Feel free to swap in baby bella mushrooms or experiment with apple cider vinegar for a fruitier twist.
How to Make Homemade Pickled Mushrooms (Step-by-Step)
You don’t need a background in canning or fermentation. You just need this guide and a few jars.
Step 1 – Roast the Mushrooms
Roasting gives the mushrooms a meatier, more complex texture and flavor.
- Preheat your oven to 350°F.
- Clean the mushrooms: rinse gently and pat dry with a paper towel.
- Trim stems if needed.
- Toss mushrooms in a large bowl with oil, ½ tsp sea salt, and the minced garlic.
- Spread on a baking sheet in one layer.
- Roast for about 10 minutes, until they begin to soften and brown.
Let them cool slightly before moving to the next step.
Step 2 – Prepare the Brine
While the mushrooms are cooling, start building the brine.
- Combine the water, vinegar, remaining 1 tsp salt, and sugar in a saucepan.
- Heat over medium-high, stirring until the sugar and salt are dissolved.
- Remove from heat and set aside.
You’ll want this brine warm—but not boiling hot—when you pour it into the jars.
Step 3 – Fill and Seal Your Jars
Get your jars sterilized and ready to go. You don’t need to do a full canning process, just clean them thoroughly with hot water.
- Evenly divide the sliced garlic, peppercorns, and thyme sprigs among the jars.
- Add roasted mushrooms on top, packing them in without crushing.
- Pour the brine over the mushrooms until completely submerged.
- Leave about ½ inch of space at the top of the jar.
- Seal with lids and let them cool on the counter before placing in the refrigerator.
Tips for Perfect Pickled Mushrooms Every Time
Pickling is easy, but a few pro tips can help you avoid soggy results or bland bites.
Helpful Hints:
- Use mushrooms that are firm and fresh—no slimy spots.
- Don’t skip the roasting step—that caramelization builds flavor.
- Sterilize your jars with hot water or in the dishwasher on high heat.
- Let the mushrooms pickle for at least 24 hours before eating for the best flavor.
- Always use a clean utensil to grab mushrooms from the jar to avoid contamination.
How to Eat Pickled Mushrooms (Because You’ll Want to Put Them on Everything)
You made them. Now what? Honestly, the sky’s the limit.
Tasty Serving Ideas:
- Toss into salads for a tangy punch.
- Add to charcuterie boards alongside olives and cured meats.
- Spoon onto bruschetta or crostini with creamy cheese.
- Mix into grain bowls with farro, quinoa, or couscous.
- Pair with roasted chicken or steak as a savory condiment.
- Enjoy straight from the jar as a snack (no judgment).
Variations and Flavor Twists
Want to get creative? These mushrooms are a blank canvas.
Swap or Add-In Suggestions:
- Use red wine vinegar for a deeper color and taste.
- Add chili flakes for heat.
- Swap thyme with dill, rosemary, or oregano.
- Add sliced shallots or red onion for an extra layer of flavor.
- Try portobello mushroom slices for a more substantial bite.
Storage Tips and Shelf Life
You’re making refrigerator pickles—not shelf-stable preserves—so storing them right is key.
What to Know:
- Store in the refrigerator at all times.
- Keep sealed jars for up to 3 weeks.
- Make sure mushrooms are fully submerged in the brine.
- Always use clean utensils to scoop out servings.
Nutritional Breakdown (Per Serving)
This recipe yields about 6 servings. Here’s a nutritional estimate:
| Nutrient | Amount |
|---|---|
| Calories | ~50 |
| Fat | ~2g |
| Carbohydrates | ~5g |
| Protein | ~1g |
| Fiber | ~1g |
Great for low-calorie snacking without sacrificing flavor.
FAQ: Your Pickled Mushroom Questions Answered
How long do homemade pickled mushrooms last in the fridge?
Typically, you can store them for up to three weeks. Just make sure they’re submerged in brine and kept cold.
Can I use apple cider vinegar instead of white vinegar?
Yes. It adds a slightly sweet, fruity touch that works beautifully with garlic and thyme.
Do I have to roast the mushrooms?
No, but roasting enhances the flavor and texture. Skipping it will give you a firmer bite, closer to classic pickles.
Can I can these mushrooms for pantry storage?
This recipe is for refrigerator pickling only. For shelf-stable pickles, you’d need a different method with proper canning practices.
Can I freeze pickled mushrooms?
It’s not recommended. Freezing changes the texture and can make them mushy once thawed.
Wrap-Up: Make It, Jar It, Love It
You don’t need to wait for the next trip to the farmer’s market or that specialty deli. With just a handful of ingredients and under half an hour of effort, you’re transforming basic mushrooms into a vibrant, crave-worthy snack that lasts for weeks.
Whether you’re hosting friends, upgrading your salad game, or just treating yourself, these homemade pickled mushrooms with garlic and thyme hit the spot every time.
Print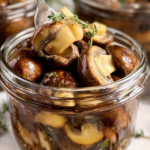
Homemade Pickled Mushrooms with Garlic and Thyme: Your Tangy DIY Delight
- Total Time: 25 minutes
- Yield: 6 servings 1x
Description
- Enjoy homemade pickled mushrooms with garlic and thyme—tangy, savory, and perfect for snacks, salads, or sides.
Ingredients
- 1 ½ lbs white button mushrooms (or cremini, baby bella)
- 1 tablespoon vegetable or olive oil
- 1 ½ teaspoons sea salt, divided
- 2 teaspoons minced garlic
- 2 cups water
- 1 cup white vinegar
- 2 tablespoons granulated sugar
- 4 cloves garlic, thinly sliced
- 2 teaspoons black peppercorns, divided
- Fresh thyme sprigs
Instructions
- Preheat the oven to 350°F.
- Wash the mushrooms thoroughly and pat them dry. Trim the stems if needed.
- In a large bowl, toss the mushrooms with 1 tablespoon of oil, ½ teaspoon of sea salt, and minced garlic.
- Spread the mushrooms in a single layer on a baking sheet and roast for about 10 minutes until softened. Set aside to cool.
- While the mushrooms are cooling, combine the remaining 1 teaspoon of salt, water, vinegar, and sugar in a saucepan. Heat over medium-high and stir until the sugar and salt are fully dissolved. Remove from heat once dissolved.
- Prepare sterilized canning jars and distribute the sliced garlic, peppercorns, and fresh thyme sprigs evenly between them.
- Fill each jar with the roasted mushrooms, then pour the brine over the mushrooms, ensuring they are fully covered. Leave a small amount of space at the top of the jar for sealing.
- Secure the lids on the jars and refrigerate until ready to use.
- Details:
- These homemade pickled mushrooms are the perfect combination of savory, tangy, and aromatic. Roasted to bring out their natural flavors, the mushrooms are then soaked in a brine infused with garlic, peppercorns, and fresh thyme. Ideal for snacking or as a flavorful addition to salads, sandwiches, and more.
- Prep Time: 15 minutes
- Cook Time: 10 minutes
Nutrition
- Serving Size: 6 servings
- Calories: 50 kcal per serving
Keywords: #PickledMushrooms #HomemadePickles #GarlicLovers #HealthySnacks #TangyBites #MushroomRecipe #SnackIdeas